You’re planning a Tesla home charger and want a clear, code-compliant budget. Expect $400–$700 for a Wall Connector or $200–$300 for a Mobile Connector, plus $500–$1,500 for typical installation, permits, and materials. Safety steps—correct circuit sizing, GFCI, load calculations, and inspections—matter. Rebates, panel limits, and conduit runs can swing costs thousands. Here’s how to right-size your setup and avoid surprise upgrades…
Key Takeaways
- Hardware: Wall Connector costs about $400–$700; Mobile Connector about $200–$300; accessories can add up to ~$800.
- Typical professional installation runs $500–$1,500 for labor and materials with a nearby panel and no upgrades.
- Permits and inspections usually add $50–$300; often required for code compliance and incentives.
- Panel or service upgrades, if needed for capacity, can add roughly $300–$6,000+.
- All‑in project cost commonly totals $900–$2,500 before incentives; rebates can significantly reduce the net price.
What a Tesla Home Charger Includes

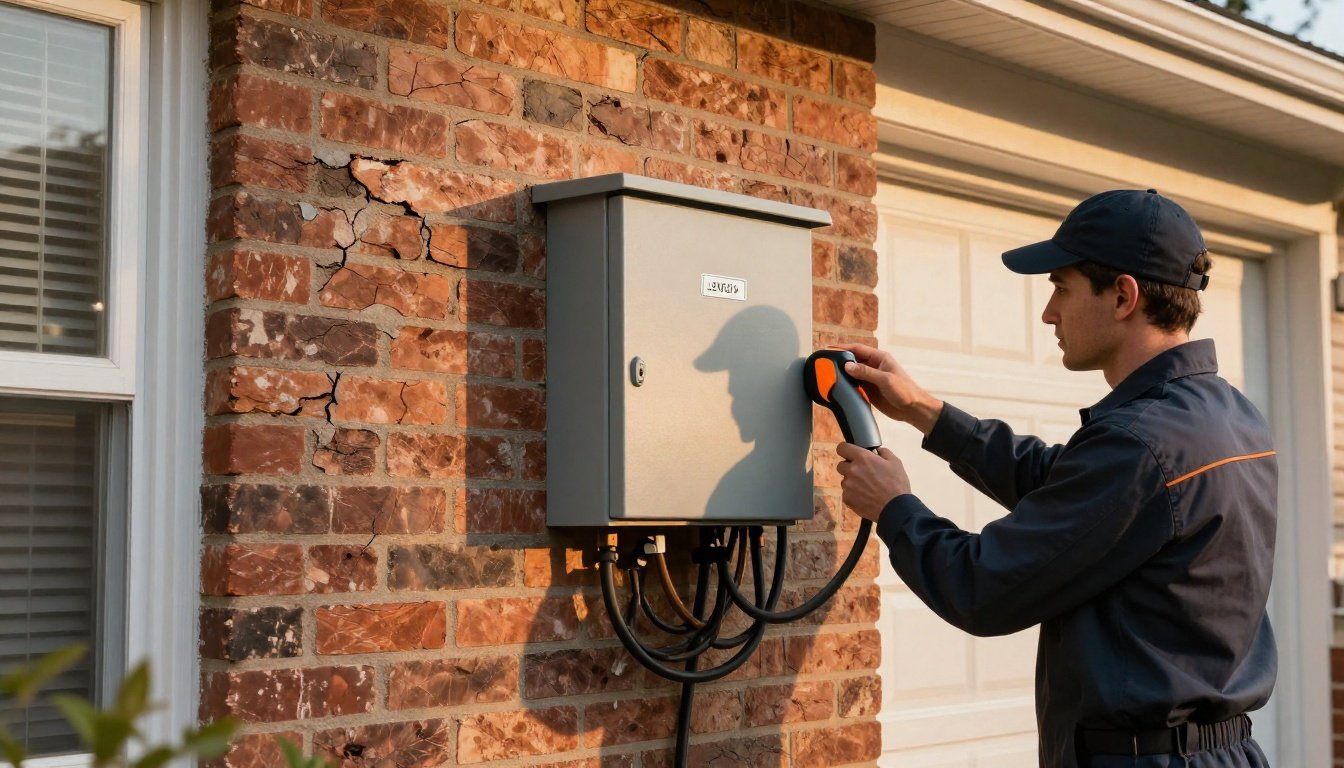
A Tesla Wall Connector package includes the Gen 3 charger with a 24‑ft charging cable, integrated cable holster, mounting backplate, and a hardware kit (anchors and screws), plus an installation guide. You also get the mounting hardware needed for standard stud or masonry installs.
Plan a dedicated, correctly sized circuit (typically 60A for 48A output) per NEC and local code. Use copper conductors, proper torque, and an outdoor‑rated location if exposed. A licensed electrician should verify breaker type, conduit fill, bonding, and clearances before energizing. The faceplate and terminal cover provide touch‑safe protection; don’t defeat them. Commission the charger, test GFCI functionality, and confirm firmware updates. Keep receipts and serial data for warranty coverage, and retain the installation guide for inspections before first use.
Wall Connector vs. Mobile Connector

You’ll compare charging speed: a Wall Connector supports higher amperage for faster Level 2 charging, while the Mobile Connector is limited by 120V/240V outlets and lower current. You’ll account for installation and costs—panel capacity, breaker/conductor sizing, permits, and GFCI/location requirements—using a licensed electrician to meet NEC and local code. You’ll also weigh portability and features: fixed mount with cable management, Wi‑Fi, and load sharing versus a travel-ready cord with interchangeable adapters.
Charging Speed Comparison
How much faster is a hardwired Wall Connector than the portable Mobile Connector? In typical U.S. homes, a Wall Connector delivering 48A at 240V adds roughly 30–44 miles per hour, while a Mobile Connector on 120V adds about 2–3 mph, and on 240V at 12–32A adds about 7–22 mph. That delta drives Range Impact on overnight replenishment and trip readiness. Battery Chemistry also matters: cold-soaked packs and high states of charge will taper, narrowing differences at the top of the charge.
You should match charger output to your vehicle’s onboard charger rating, verify circuit amperage, and use properly sized conductors. Monitor plug temperature, route cables to prevent tripping, and keep connectors dry. For predictability, schedule charging during temperatures and precondition before peak-current sessions.
Installation and Costs
While both options charge at home, installation steps and total cost differ sharply. A Wall Connector typically requires a dedicated circuit, hardwiring, and permits. Hire a licensed electrician to assess panel capacity, run conduit, install a breaker, and pull inspections to meet NEC and local code. Expect $500–$1,500 for labor and materials, plus the unit cost. If your panel needs an upgrade or long runs, budget more and extend Timeline Expectations to several weeks.
A Mobile Connector uses a NEMA 5-15 or 14-50 receptacle. You’ll still want an electrician to verify load calculations, install a grounded outlet, GFCI where required, and label the breaker. Outlet work often lands between $150–$700. Consider load management to avoid trips. Check Warranty Coverage; improper installations can void protections.
Portability and Features
Set the two chargers side by side, and their missions diverge. The Wall Connector fixes to a dedicated circuit, delivers up to 48A, and supports Smart Integration features like load balancing and scheduled charging through Wi‑Fi. It’s semi‑permanent, code‑compliant when installed on a properly sized breaker with GFCI protection, conduit, and labeling. The Mobile Connector prioritizes portability: plug it into 120V or 240V outlets with adapters, accept lower amperage, and pack it thanks to its Compact Design. You’ll verify outlet ratings, use a listed receptacle, and avoid extension cords. Wall Connector wins for speed, cable management, and shared power across vehicles. Mobile Connector wins for travel and backup. Choose based on required amperage, circuit availability, and on‑site code constraints. Document installations for inspection approval.
Hardware Price Range

Most buyers can expect the Tesla home-charging hardware itself to run between $200 and $800, depending on what you choose and any accessories you add. You’ll see brand pricing differences between Tesla’s Mobile Connector, Wall Connector, and compatible third-party units. Expect roughly $200–$300 for a Mobile Connector, $400–$700 for a Wall Connector, and up to $800 when you add a pedestal, cable management, or extra adapters. Compare warranty variations: many units include 1–4 years, with exclusions for cords or wear.
Prioritize UL or ETL listing, NEC-compliant labeling, thermal protection, ground-fault detection, and indoor/outdoor ratings (NEMA 3R or better). Verify amperage (32–48A), cord length (18–24 ft), firmware update support, and load-sharing capability. Check plug type and adapter set to match your vehicle and outlet safely.
Typical Installation Cost Breakdown

Several predictable line items make up a Tesla home‑charger installation: permitting/inspection, electrical work and materials, and labor, with add‑ons for panel or service upgrades and long wire runs.
You’ll face permits and inspection at $50–$300, including load calculations and a simple plan set. Electrical work typically adds a dedicated 240V, 60A circuit (NEC 625), copper THHN/THWN‑2 conductors (often #6 AWG), EMT or PVC conduit, a sized breaker, and a NEMA 3R disconnect where required. Materials run $150–$500. Labor spans 3–8 hours at $85–$150 per hour, including mounting, terminations, torque verification, labeling, and commissioning the Wall Connector per 110.3(B).


Close the permit and keep the inspection record; it supports Insurance Impact and can protect coverage. Using UL‑listed equipment and a licensed electrician reduces hazards. Documented, code‑compliant charging also helps preserve Home Value and resale confidence.
Factors That Increase Installation Costs

You’ll see costs rise if your electrical panel lacks capacity and needs an upgrade to support a properly sized 240V breaker and conductor per local code. Long wiring runs add labor and materials, especially when conduit, trenching, or wall/ceiling fishing is required to maintain NEC clearances and protection. Plan for permits, load calculations, and a licensed electrician’s site assessment to verify service capacity, routing, and safe, code-compliant installation.
Electrical Panel Upgrades
If your existing service can’t safely handle the added EV load, upgrading the electrical panel often becomes the priciest part of a Tesla charger install. You’ll start with capacity planning via a licensed load calculation, then specify breakers, wire ratings, and whole‑home surge protection to meet code and protect electronics.
| Service size | Typical actions | Cost range |
|---|---|---|
| 60A existing | New 200A panel, service upgrade | $2,500–$6,000 |
| 100A existing | 200A panel swap, meter/main work | $1,800–$4,500 |
| 125–150A | Panel reconfiguration, new breakers | $800–$2,000 |
| 200A adequate | Add 60A breaker, labeling | $300–$900 |
Expect permits, utility coordination, proper grounding/bonding, and AFCI/GFCI where required. A pro verifies short‑circuit ratings, main breaker sizing, conductor fill, and working clearances to guarantee a safe, inspection-ready install. This diligence avoids overloads, nuisance trips, and voided equipment warranties.
Long Wiring Runs
After verifying panel capacity, long feeder runs often drive costs and complexity. Longer distances mean larger conductors to limit voltage drop, more conduit, and extra labor. You’ll also pay for trenching or attic crawls, penetrations. Keep the run as straight and accessible as possible, while meeting conduit fill, support spacing, and clearances.
- Conductor sizing: For 60A continuous EV loads, specify copper THHN/THWN in appropriately sized EMT or PVC; verify ampacity, temperature ratings, and voltage-drop under 3%.
- Routing method: Choose surface EMT for durability, or underground PVC with expansion fittings; include rodent protection, bushings, and drip loops; seal exterior entries.
- Aesthetic concealment and safety: Align with wall lines, paintable conduit, GFCI where required, proper bonding, labels, and disconnect visibility. Add pull boxes at 180° bends.
Permits, Codes, and Inspection Requirements

Before installing a Tesla Wall Connector, verify permitting, code, and inspection requirements with your Authority Having Jurisdiction (AHJ). Confirm Zoning restrictions, setback rules, and exterior equipment allowances, especially for garages, carports, and multifamily parking. Ask about Enforcement penalties for unpermitted work, stop‑work orders, and fines.
Hire a licensed electrician who will pull the electrical permit, submit a site plan, and list equipment ratings and UL listings. Many AHJs require a rough inspection for conduit, trench depth, bonding, and GFCI placement, followed by a final inspection for labeling, working clearances, and fastening. Secure HOA or property‑manager approval when applicable. Expect separate permits for panel work or driveway trenching. Keep permit cards on‑site, schedule inspections ahead, and close the permit to finalize compliance and record approvals.
Charging Speeds and Electrical Requirements

You’ll size charging speed by circuit amperage—following the 80% continuous-load rule (e.g., 20A→16A, 40A→32A, 60A→48A)—with higher amperage delivering faster Level 2 charging. For 240V outlet requirements, you’ll use a dedicated circuit with correctly sized breaker and conductors (e.g., 40A/8 AWG for 32A, 60A/6 AWG for 48A), a NEMA 14-50 or hardwired EVSE as allowed, and GFCI/AFCI per NEC 625 and local code. Verify panel capacity with a load calculation, maintain working clearances, and schedule inspection to prevent overheating and nuisance trips.
Charging Speed by Amperage
Most home charging speeds hinge on amperage and the 240‑volt circuit that feeds your Tesla. Higher amperage raises kW and miles per hour, but continuous-load code limits you to 80% of breaker rating. You’ll balance speed, Cable Heating, and Grid Impact with proper conductor sizing and charger settings.
- 16A (3.8 kW): about 12–15 miles/hour; gentle on wiring; slower, overnight top‑offs.
- 32A (7.7 kW): roughly 25–30 miles/hour; common for balanced speed and heat; good daily choice.
- 48A (11.5 kW): around 35–44 miles/hour; fastest typical home rate; verify panel capacity and temperature rise.
Set the wall connector’s current to match the circuit, and monitor charging sessions. Warm cables, nuisance breaker trips, or dimming lights signal issues that warrant an electrician’s load calculation review.
240V Outlet Requirements
How do you choose a safe, code‑compliant outlet for Tesla charging? Start by confirming a dedicated 240V circuit sized for continuous load at 125%: 32A draw needs a 40A breaker; 40A draw needs 50A. Use copper conductors, correct wire gauge, and a GFCI breaker where required. Verify receptacle type (NEMA 14‑50, 6‑50, or 5‑15 for 120V) matches your adapter and meets Compatibility standards. Check box fill, grounding, and Physical dimensions so the plug seats without strain and has clearance.
| Outlet type | Typical speed* |
|---|---|
| 120V NEMA 5‑15 | ~3–4 miles/hour |
| 240V NEMA 6‑50 | ~25–30 miles/hour |
| 240V NEMA 14‑50 | ~30–35 miles/hour |
Install indoors or weatherproofed outdoors (in‑use cover, wet‑location rating). Keep runs short to limit voltage drop. Always hire a licensed electrician, pull permits, and schedule inspections.
Rebates, Incentives, and Tax Credits

Before finalizing your budget, don’t overlook federal, state, local, and utility incentives that can reduce the cost of a Tesla home charger and its installation. Many programs cover hardware, wiring, permits, or panel upgrades if you meet eligibility criteria and follow a documented application process. Verify code, inspection requirements, and EVSE listing (UL, ENERGY STAR) to qualify.
- Confirm program rules: residency, charger type, licensed electrician, permit, photos, and final inspection. Capture itemized invoices showing labor, materials, and permit numbers.
- Time your install: pre-approval is required. Submit forms, W‑9s, load calculations, and a one-line diagram before work starts; keep approvals on file.
- File for credits: claim federal tax incentives with proper IRS forms; submit utility rebates online within deadlines. Retain receipts, approvals, and inspection certificates.
Cost Comparison: Home Charging vs. Supercharging

While Superchargers maximize speed, home charging typically delivers a lower cost per mile once you account for energy rates, charging losses, and equipment amortization. At home, your rate usually mirrors utility off-peak pricing, while Superchargers reflect commercial power, site overhead, and network fees billed per kWh or minute. You also skip idle fees and travel time.
Home setups incur modest losses through the EVSE and wiring, but a code-compliant circuit, correct breaker sizing, and proper conductor gauge keep efficiency high and risks low. Supercharging adds thermal overhead and may accelerate battery wear, indirectly increasing total cost. Environmental costs differ too: home charging can align with cleaner off-peak generation, while detours to stations add miles. A quality installed charger can improve convenience and resale impact.
Tips to Save on Installation and Ownership

Home charging often beats Supercharging on cost per mile, so lock in those savings by planning a code-compliant, efficient install. Use a licensed electrician, pull permits, and size continuous loads at 125% per NEC 625 to prevent nuisance trips and overheating.
Lock in savings with a code-compliant install: pull permits, hire licensed pros, size loads at 125% (NEC 625).
- Right-size the circuit: a 60A breaker for a Wall Connector, copper conductors, shortest conduit runs, and a load calculation to avoid panel upgrades. Add required GFCI/AFCI, a labeled disconnect, and whole-home surge protection.
- Cut energy costs with Smart Scheduling, off-peak TOU rates, and utility rebates. Join demand-response programs; coordinate with solar or a battery.
- Reduce ownership costs: keep the cable off the ground, update firmware, retorque lugs, dust vents, and leverage Community Discounts or group buys to lower long-term failure risk and costs.
Conclusion
You’ve seen what a Tesla home charger costs and what drives it. Plan proactively: set a budget, solicit three bids, specify breaker size, and secure permits. Prioritize protection: follow code, pull inspections, photograph wiring, and preserve warranties. Shorten runs, select sensible amperage, and seek state, utility, and federal incentives. Coordinate with HOAs and schedules. Smart, safe, standards‑compliant choices create consistent, convenient charging and sustainable savings—so you charge confidently, cut costs, and keep compliance central, always.