Your Tesla can halt charging when the connector’s temperature delta crosses a hidden threshold, even if the plug looks fine. You’ll troubleshoot faster if you start with alignment, cable strain, station status, and app charge limits, then move to port inspection and circuit checks. We’ll prioritize safe, noninvasive steps before tools or resets. Before you replace hardware or call support, verify these high‑impact checks most owners miss.
Key Takeaways
- Verify settings and authorization in Tesla app and Controls > Charging; check station status, charge limit, schedules, current limit, and connectivity before plugging in.
- Inspect port and connector for damage, debris, or heat; clean with compressed air or 99% isopropyl; stop and service if corrosion or arcing appears.
- Confirm circuit and hardware meet load rules: breaker, wiring gauge, receptacle type, dedicated circuit; measure voltage sag under load and derate current if needed.
- Use certified, compatible cables and adapters; avoid extension cords; ensure tight fit, monitor connector temperature, replace damaged cords, and lower amps on weak circuits.
- Update firmware, reboot the vehicle, and retry another stall; reseat the connector, check error codes, and contact Tesla or an electrician if faults persist.
Quick Checks Before You Start

Before you dig into diagnostics, run these quick checks to rule out simple causes and hazards. Park squarely; confirm parking alignment lets the cable reach without tension or trip risks. Verify the site’s power: look for station status lights or outage notices. In the Tesla app, confirm your charge limit, scheduled charging, and current limit aren’t restricting sessions. Confirm your profile’s payment method is valid and the session authorized; resolve holds or network errors. Disable Valet Mode and Powerwall charge limits affecting grid charging. Check cellular/Wi‑Fi connectivity for authentication. Confirm the EVSE cable isn’t overheated; pause if it’s hot. Inspect for wet floors, ice, or traffic hazards. If faults persist, note error codes and timestamps. Document location, charger ID, and weather conditions for troubleshooting.
Inspecting the Charge Port and Connector

Before connecting power, inspect the charge port and connector under good lighting for cracks, bent pins, heat discoloration, or melted plastic. Use a nonconductive tool and dry compressed air to clear debris; don’t use metal objects or liquids. If you see green/white corrosion, pitting, or residue on contacts, stop charging and schedule service to prevent arcing and further damage.
Visual Damage Check
Once charging has stopped and the vehicle is in Park, perform a careful visual inspection of the charge port and connector for heat or impact damage. Verify the charge port door opens smoothly and sits flush; note any panel misalignment or rubbing. Check for paint bubbling, discoloration, or warping around the port that could indicate overheating. Examine the connector shroud and handle for cracks, deformation, or softening. Look for melted plastic, scorch marks, or a shiny, glazed pin surface. Confirm the latch clicks positively and the connector seats fully without excessive force. Gently wiggle the handle; there should be no looseness at the port. If you detect physical damage, stop using the equipment and schedule service through the app for prompt evaluation and repair.
Debris and Corrosion
While the vehicle is parked and charging is stopped, inspect the charge port and connector for debris, moisture, and corrosion that can interrupt current flow or cause overheating. Power down the EVSE, don insulated gloves, and use a flashlight. Look for pitting, verdigris, blackening, or warped plastic around pins. Do not scrape pins; plating and Contact metallurgy are delicate. Blow out dry dust with oil‑free compressed air. Remove light grime using a lint‑free swab barely moistened with 99% isopropyl; keep liquids away from the latch and vents.
Check for water intrusion, bent pins, or melted seals. Reseat the connector firmly and attempt a low‑amp test. Monitor pack and inlet temperatures via vehicle Diagnostic sensors. If resistance, arcing, or corrosion persists, stop and schedule service.
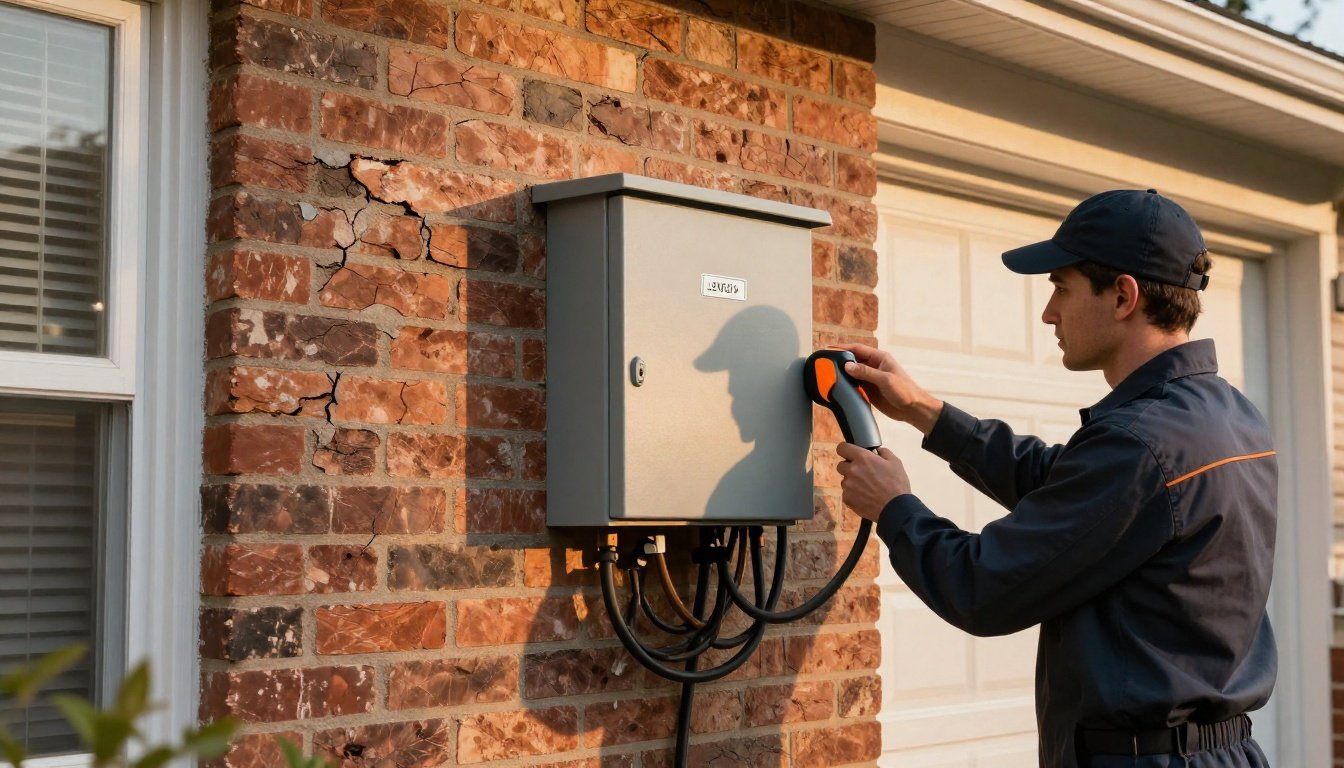
Verifying Power Source and Circuit Health

Start by confirming the outlet or circuit feeding the charger is safe and correctly rated. Verify receptacle type, amperage, and breaker labeling match the charger’s setting. De-energize, then inspect terminations for tightness, discoloration, or melted insulation. Restore power and measure line-to-line and line-to-neutral voltage; compare to expected 240/120 V. Under load, log voltage sag and current with a clamp meter to spot undersized conductors or shared loads.
Check GFCI/AFCI function and nuisance trips. Measure neutral-to-ground voltage and assess ground impedance to provide a low-resistance fault path. Confirm continuous equipment grounding and bonding.
Test that the breaker is dedicated, not tandem-fed, and appropriately sized. If readings drift, or the breaker runs hot, stop and consult a licensed electrician. Document findings for trends and warranty support.
Managing Temperature: Heat, Cold, and Battery Conditioning

Because temperature directly governs charge rates and protection thresholds, manage heat, cold, and battery conditioning before blaming hardware. Verify the app shows Battery Preconditioning when approaching a charger; arrive with 10–40% SOC and a warm pack. In freezing weather, use Cabin preconditioning and seat heaters to reduce pack draw, then schedule charging to finish near departure. Enable Scheduled Departure so the BMS heats cells just-in-time. In heat, park shaded, vent windows, and pre-cool; begin charging when pack temperature falls below midline. Avoid fast charging immediately after spirited driving.
Use Seasonal strategies: reduce max charge rate or set a lower current when the car throttles. Monitor charging power; if it oscillates with pack temperature, pause, let the thermal system stabilize, then resume charging safely.
Cable, Adapter, and Extension Considerations
Verify the charging cable’s rated amperage matches the circuit breaker and your Tesla’s requested current to prevent overheating and nuisance trips. Confirm adapter compatibility—use Tesla-approved hardware that matches the plug standard, make sure it’s firmware-ready—and inspect pins and latches for wear before you connect. Don’t use extension cords; if reach is insufficient, reposition the vehicle or install a properly rated receptacle or EVSE.
Correct Cable Amperage
While diagnosing charging interruptions, verify every cable, adapter, and any extension in the path is rated for the charger’s continuous current and the circuit’s breaker. Check the nameplate amp rating on each component and match it to the EVSE’s set current, not just the outlet rating. Use ampacity charts to confirm the required wire gauge for the run length and insulation type. Undersized conductors cause voltage drop, heat, and thermal trips.
Measure voltage at idle and under load; a sag over 5% indicates excessive resistance. Inspect connectors for discoloration, insulation, or melted blades—signs of overheating. Avoid coiling or covering cables during charging; they must dissipate heat. Replace damaged cords. If a breaker trips, derate current to 80% of breaker capacity until faults are corrected.
Adapter Compatibility Checks


How do you rule out an incompatible adapter as the cause of charging drops? Begin by confirming the adapter’s Manufacturer compatibility with your Tesla model and charger limits. Inspect plug geometry, pin depth, and latch fit; any looseness invites heat and intermittent current.
- Verify ratings: Match adapter voltage and amperage to circuit and EVSE output. The adapter must exceed breaker and EVSE specs; derate by 20% for continuous loads.
- Check safety evidence: Look for proper Certification markings (UL, ETL, CE as applicable), temperature rise limits, and flame class. Reject devices lacking traceable test reports or serials.
- Test under load: Seat fully, clean contacts, then charge. Monitor connector temp by touch, listen for relays clicking, and watch Tesla app for current taper or error codes.
Avoiding Extension Cords
Although it’s tempting to add length with an extension cord, don’t use one for EV charging. Extension cords introduce voltage drop, heat, and connector resistance that trigger charging interruptions and fire hazards.
Use only the Tesla Mobile Connector or a hardwired EVSE on a dedicated circuit. Verify breaker sizing and conductor gauge for a 125% continuous load per NEC. Install the outlet close to the vehicle or relocate the EVSE; don’t daisy-chain adapters.
Inspect receptacles for heat discoloration, replace worn plugs, and torque terminals to spec. Keep connectors dry and off the ground. If you need more reach, upgrade to a longer, UL-listed EVSE cable from the manufacturer.
Bypassing guidance risks Insurance Implications and Liability Concerns if overheating, property damage, or injury occurs. Always.
Smart Charging Settings to Enable in the App

Start by opening the Tesla app and configuring smart charging features that minimize interruptions and protect your electrical circuit. In Controls > Charging, confirm your charge limit and current are appropriate for the outlet’s rating, then enable automation that reduces peak load and grid noise.
Open the Tesla app to set safe charge limits and enable automation that reduces peak load and grid noise.
- Scheduled Charging — Set a fixed start time during off‑peak hours to lower demand, stabilize voltage, and improve Cost Optimization. Verify the utility’s time-of-use windows. Keep a minimum buffer if you need early departure.
- Scheduled Departure — Enable preconditioning and off‑peak charge completion. The car finishes just before you leave, reducing heat and cable stress.
- Charge Current Limit — Manually reduce amps on weak circuits or shared panels. Step down gradually if you see current reductions or warm plugs.
Firmware Updates and Reboots That Solve Glitches

First, check your current firmware version in the vehicle and app, confirming it’s the latest release with charging fixes. If interruptions persist, perform a soft reboot: park safely, keep the car in Park, then press and hold both steering‑wheel scroll buttons until the screen resets. To minimize downtime and risk, schedule firmware updates overnight on stable Wi‑Fi and keep the vehicle plugged in.
Check Current Firmware
How do you rule out a software glitch before tearing into hardware? First, confirm the vehicle’s current firmware. From the touchscreen: Controls > Software. Note the Build Number and release channel. In the Tesla app, confirm no update is pending and that Wi‑Fi or cellular signal is stable. Document the exact version before any charging diagnostics.
- Record the Build Number and read the release notes. Compare them against Tesla’s official release tracker to see if charging fixes apply to your model and region.
- Validate integrity. Verify “Software up to date” appears and the last install completed. Tesla performs Checksum Verification; if you see repeated download/install failures, open a service ticket.
- Correlate timing. Match the update timestamp with the first interruption. Save logs and photos.
Perform Soft Reboot
Performing a soft reboot can clear transient software faults that interrupt charging without touching hardware. Park safely, keep the vehicle in Park, and confirm ventilation if you’re inside. For driver safety, disconnect the charge cable only if instructed by the screen. To reboot the touchscreen, use the button combinations: hold both steering‑wheel scroll buttons until the display goes black, then wait for Tesla “T” to reappear. If charging faults persist, execute a full soft reset: with the car in Park, press and hold scroll buttons and the brake for 10 seconds; release and wait two minutes for systems to reload. Verify charging resumes, Bluetooth reconnects, and warning icons clear. Avoid interacting with pedals or shifter during recovery. Document results for service if issues persist.
Schedule Overnight Updates
If a soft reboot stabilizes charging, schedule overnight firmware updates to apply fixes and a clean system restart without disrupting your sessions. Plan the update window when you’re home, the car is parked outside or in a ventilated garage, and the state of charge is above 20%. Verify time zones and notification timing so the install starts after charging completes, not mid-session.
- In the Tesla app or car display, open Software, select Schedule, and set a start time after off-peak rates. Enable update over Wi‑Fi only.
- Before bedtime, stop charging, unplug, and keep doors closed. Avoid sitting in the vehicle during install to prevent wake events.
- After completion, power cycle: lock, wait five minutes, then resume charging and confirm no faults.
Troubleshooting at Home Charging Stations

Before you diagnose software issues, verify the home hardware and power supply are sound. De-energize the EV circuit at the breaker. Confirm the breaker and wiring gauge match the charger’s continuous load rating (125% rule). Check torque on lugs, neutral and ground continuity, and GFCI/AFCI status. Inspect the receptacle or Wall Connector for heat discoloration, cracked insulation, or moisture. Re-energize. Using a multimeter, measure line-to-line and line-to-neutral voltage under load; look for sag beyond 5%. Verify tight plug fit and undamaged adapters. Make sure adequate ventilation; many units derate when hot. Review installation compliance with permit requirements and incentive programs documentation. On the vehicle side, set the correct charging current, disable scheduled departure temporarily, and reseat the charge handle until you hear the latch click.
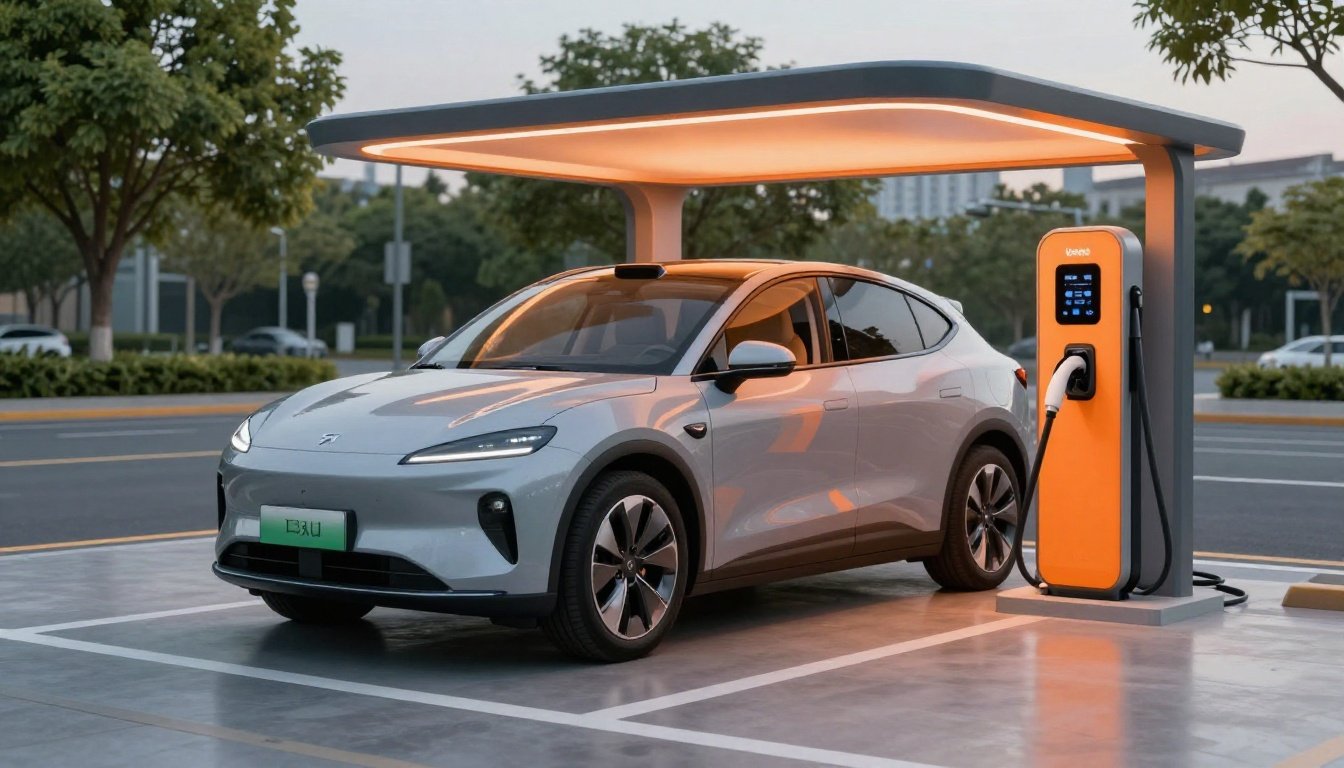
Troubleshooting at Superchargers and Public Networks

After confirming your home hardware is sound, apply the same discipline at Superchargers and public stations: verify site status, inspect equipment, and validate session setup to isolate faults. Check the network app for outages or power limits, arrive with a warm battery, and park within cable reach without strain.
1) Site verification: Use in-car nav/app to confirm availability, power levels, and pricing; observe cones or labels; select another stall if others report faults.
2) Connector and stall: Inspect handle, pins, and latch; avoid damaged cables; seat the connector fully; try another post (A/B pairing); minimize cabin loads.
3) Session and payments: Start via plug-and-charge, app, or RFID; confirm kW rises; resolve Payment Issues by updating your card; follow Station Etiquette—don’t block stalls; move after taper then depart.
Reading On-Screen Alerts and Knowing When to Contact Tesla Support

When a charging alert appears, read the banner and tap the notification to open details that identify source, severity, and the next action. Review the code, timestamp, and component named (charge port, cable, inlet, thermal system, grid). Use Alert interpretation to decide: informational (monitor), warning (retry after corrective steps), or critical (stop and unplug). Follow on-screen steps: reseat the connector, try a different stall, inspect for heat or debris, and verify firmware and app are current.
Apply Escalation criteria promptly. Contact Tesla Support if the alert is red or repeats across locations, mentions high-voltage isolation, inlet temperature, contactor, coolant, or persistent power restriction, or if the vehicle won’t begin charging after standard resets. Note site, stall, SOC, weather, and photos to expedite diagnosis quickly.
Conclusion
With these checks, you steer charging interruptions instead of letting them steer you. Start with alignment, settings, and station health; inspect, clean, and reseat like a pilot’s preflight. Validate power, right-size breakers, and tame heat or cold. Swap cables and adapters methodically. Reboot and update to flush software gremlins. At home or on the road, read alerts, log data, and escalate safely. When flags persist, park the tools and call Tesla or a licensed electrician.