You’ll start by auditing your roof’s orientation, shade, and structure, then calculate daily kWh for your commute and align charge times with peak sun. Size a PV array and inverter, specify UL-listed modules, rapid-shutdown, disconnects, grounding, and wire gauges per NEC. Decide grid-tied vs. battery storage, and plan permits and interconnection before buying hardware. Missteps can fail inspection; the next choices determine safety, reliability, and payback.
Key Takeaways
- Assess roof/site and driving energy needs; analyze shading, structure, sun paths, and EV mileage to align charging times with solar availability.
- Verify electrical service capacity, breaker space, grounding, and conduit routes; record utility tariff, interconnection rules, and permitting timelines before design and installation.
- Size the array for EV kWh plus losses and degradation; select UL-listed modules, racking, and code-compliant DC protection, labeling, and clearances.
- Choose inverter topology and Level 2 EVSE; size conductors and OCPDs per NEC, ensure rapid shutdown, GFCI protection, grounding, and a dedicated EVSE circuit.
- Decide grid-tied versus battery storage; model costs, incentives, production, charging profiles, and maintenance; commission with utility witness tests and document protection settings.
Assess Your Site and Driving Energy Requirements

How will your site and driving patterns shape the system you need? Start by documenting your roof orientation, tilt, and usable area. Perform a Shade Analysis across seasons to chart obstructions, irradiance windows, and snow or debris risks. Verify structural capacity and setback clearances per local code. Photograph and log sun paths at hourly intervals.


Next, quantify energy needs. Map your Commute Patterns, annual mileage, efficiency (kWh/mi), and charging schedule. Include weekend trips, temperature impacts, and accessory loads. Estimate daily and peak kWh, then align charging times with solar availability to reduce grid reliance.
Inspect your electrical service rating, spare breaker space, grounding, and bonding. Note conduit paths, distances, and outdoor ratings (NEMA). Record utility tariff, interconnection rules, and permitting timelines before installation begins.
Size the Solar Array and Select Components

With your site data, load profile, and service details documented, convert those numbers into a system specification. Determine daily kWh for driving plus balance-of-system losses, then add a margin for module degradation over 25 years. Choose PV modules whose temperature coefficient suits your climate; verify cold-weather Voc won’t exceed the equipment’s DC rating and hot-weather Vmp will still meet production targets. Size array capacity (kWdc) to offset the target kWh using code-accepted irradiance data and realistic performance ratio. Select UL-listed modules, racking, and grounding/bonding hardware; engineer mounting for wind and snow loads, roof setbacks, and fire classifications. Specify combiners, fusing, and DC disconnect ratings to NEC 690. Provide surge protection and labeling. Plan maintenance access and safe working clearances. Document calculations for permit review.
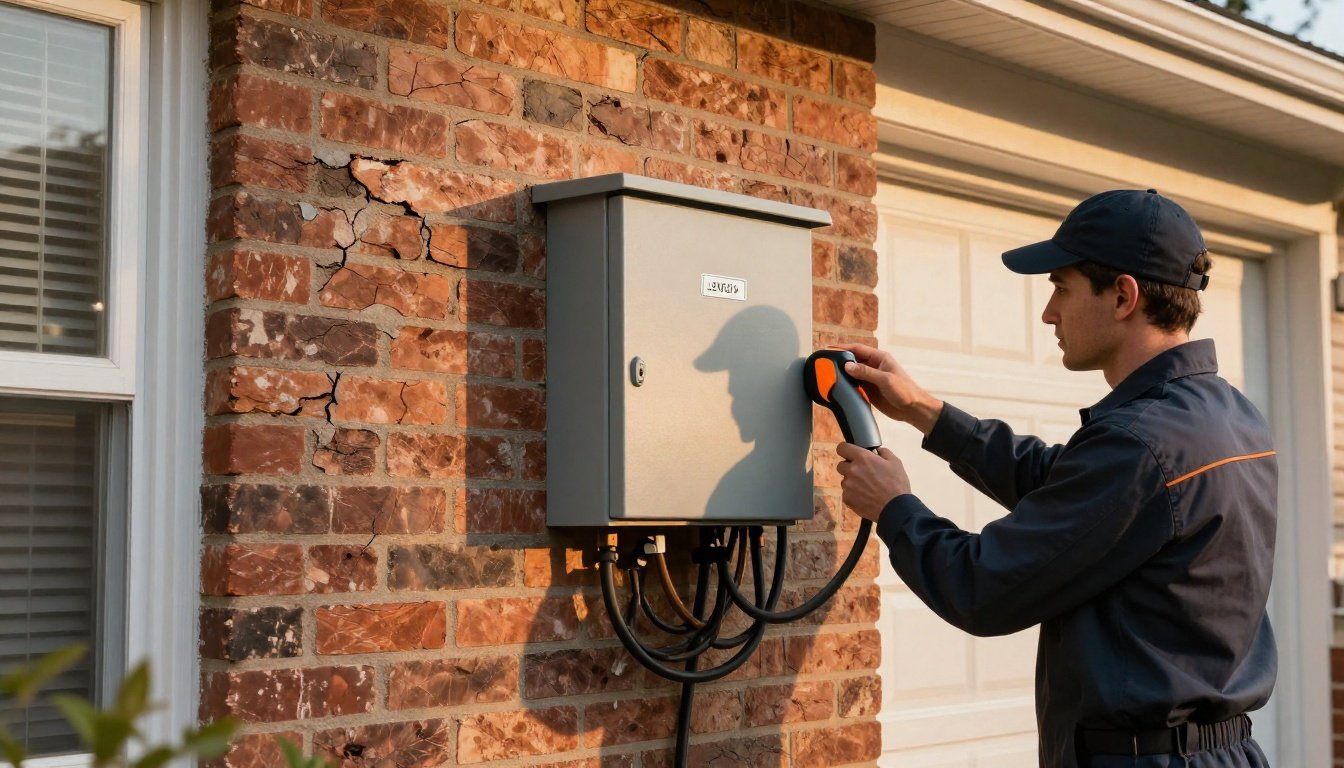
Inverters, Level 2 Chargers, and Wiring Layout

Although your array defines the DC side, you’ll now select inverters, Level 2 EVSE, and a wiring layout that meet NEC 690, 705, and 625 while protecting workers and equipment. Choose an inverter topology (string, micro, or hybrid) that matches module voltage/current and rapid-shutdown needs per 690.12. Size conductors using 125% of maximum continuous current; verify ampacity, temperature correction, and voltage drop under 3%. Use PV wire on the DC side, THWN-2 in metallic conduit on the AC side. Provide a visible AC/DC disconnect, labeled directories, and OCPDs with proper series ratings. Bond equipment, raceways, and the EVSE per grounding practices in 250 and 625.54; use GEC and EGC sized per 250.66/122. Install a 2-pole GFCI breaker for the 240V EVSE branch circuit. Dedicated.
Grid-Tied vs. Battery Storage and Net Metering

Your inverter and EVSE choices set the stage for the bigger decision: interconnect only to the utility or add battery storage, and how you’ll participate in net metering. Grid-tied systems are simpler: you synchronize to utility frequency, follow IEEE 1547 anti-islanding, and honor export limits defined in your interconnection agreement. You’ll size conductors, OCPD, and disconnects per NEC 705 and 690, and program the inverter to curtail output if required. With storage, you add a UL 9540-listed battery, a hybrid inverter, and a transfer mechanism to isolate loads during outages. You can time-shift solar to charge your EV off-peak, reduce demand spikes, and shape exports to fit billing structures. Always commission with utility witness tests and verify protection settings. Document setpoints and labeling clearly.
Costs, Incentives, Payback, and Permitting

Before you buy hardware, build a granular pro forma that captures total installed cost, incentives, payback assumptions, and code-driven permitting steps. Itemize PV modules, inverter, racking, EVSE, conductors, conduit, breakers, trenching, panel upgrades, labor, design, and inspection fees. Confirm NEC 625/690 compliance, rapid shutdown, AFCI/GFCI, overcurrent sizing, labels, and clearances. Coordinate with your AHJ for submittals, plan sets, single-line, site plan, structural calcs, and permit timelines. Include interconnection and meter fees—you’ll pay them. Stack federal ITC, state credits, rebate programs, and SRECs; model net metering and TOU rates. Forecast production, charging demand, degradation, O&M, inverter replacement, insurance, and financing costs. Run cash, loan, and PACE cases. Add contingencies for change orders and lead times. Use licensed contractors. Schedule inspections and retain as-built documentation records.
Conclusion
You’re ready to design a safe, code-compliant solar EV charger. Don’t worry if it seems complex—UL-listed gear, NEC guidance, permits, and inspections make each step clear. You’ll assess loads, size PV and inverters, plan rapid-shutdown, grounding, and labeling, then commission with meter tests and torque checks. If you charge at night, add batteries or rely on net metering. Document everything, keep clearances, and verify GFCI, OCPD, and bonding. You’ll drive on sunlight—safely, legally, reliably.