You can install a Level 3 (DC fast) charger at home, but it’s rarely practical. These 50–350 kW systems demand three‑phase service, major switchgear, grounding, permits, and utility approval—often a transformer and service upgrade, too. Expect tens to hundreds of thousands in costs plus demand charges. To stay safe and code compliant, you need proper load calculations under NEC and inspections. Here’s what it really takes—and when a smarter alternative fits.
Key Takeaways
- True L3 DCFC needs 480V three-phase; typical homes lack this, making installation impractical without major service upgrades.
- Expect utility coordination, new transformer/service, engineered plans, and inspections; approvals and construction often take 8–24+ weeks.
- Hardware runs ~$20k–$300k+, with total installed costs commonly $25k–$120k+ excluding major utility upgrades.
- Operating costs can spike from demand charges; load management and time-of-use plans are essential to control bills.
- Consider alternatives: Level 2 at home, or compact 20–30 kW DC units where service allows, for far lower cost/complexity.
What Counts as Level 3 (DC Fast) Charging

A Level 3 charger—DC fast charging—delivers high‑power direct current straight to the battery, bypassing the vehicle’s onboard AC charger. By Industry Definitions, Level 3 denotes off‑board conversion and high‑voltage operation, distinct from Level 1/2 AC EVSE. You’ll typically see 50–350 kW units using CCS, CHAdeMO, or NACS DC connectors and communicating via ISO 15118 or DIN/SAE protocols. Safety standards and codes govern these systems: NEC Article 625, UL 2202 for DC chargers, and UL 2231 for personnel protection. Interlocks, ground‑fault detection, and contactor monitoring are mandatory features. Historical Evolution matters: early CHAdeMO launched public DC fast charging; CCS unified AC/DC in one inlet; Tesla’s Supercharger/NACS broadened adoption. To count as Level 3, the equipment must be listed, labeled, and utility‑interactive as required by code.
Power Requirements and Home Electrical Capacity

Confirm the charger’s voltage and phase requirements—most DC fast units need 480 V three‑phase—which typical homes don’t have. Assess your service panel capacity, feeder size, and the utility transformer; a Level 3 install will likely require a new service and dedicated protection. Coordinate with a licensed electrician and your utility to perform load calculations and verify NEC and local code compliance.
Voltage and Phase Requirements
How much power does a Level 3 charger actually need? You’ll typically need three-phase AC at medium voltage transformed down to 480V three-phase for full-rate DC fast charging. Some units accept 208V three-phase but deliver less kW and higher current draw. Single-phase options exist only at very low outputs. Follow NEC and IEEE guidance on grounding practices, fault clearing, and voltage harmonics; specify filters or 12‑pulse/active rectifiers to keep THD within limits. Coordinate utility-supplied transformer kVA, short-circuit ratings, and protective device settings. Verify conductor sizing, insulation ratings, and clear labeling. Document utility coordination.
| Supply option | Typical voltage | Practical note |
|---|---|---|
| 480V three-phase | 480V AC, 60 Hz | Preferred for 50–350 kW DCFC |
| 208V three-phase | 208V AC, 60 Hz | Reduced power; higher current |
| 240V single-phase | 240V AC, 60 Hz | Limited; niche or residential pilots |
Service Panel Capacity
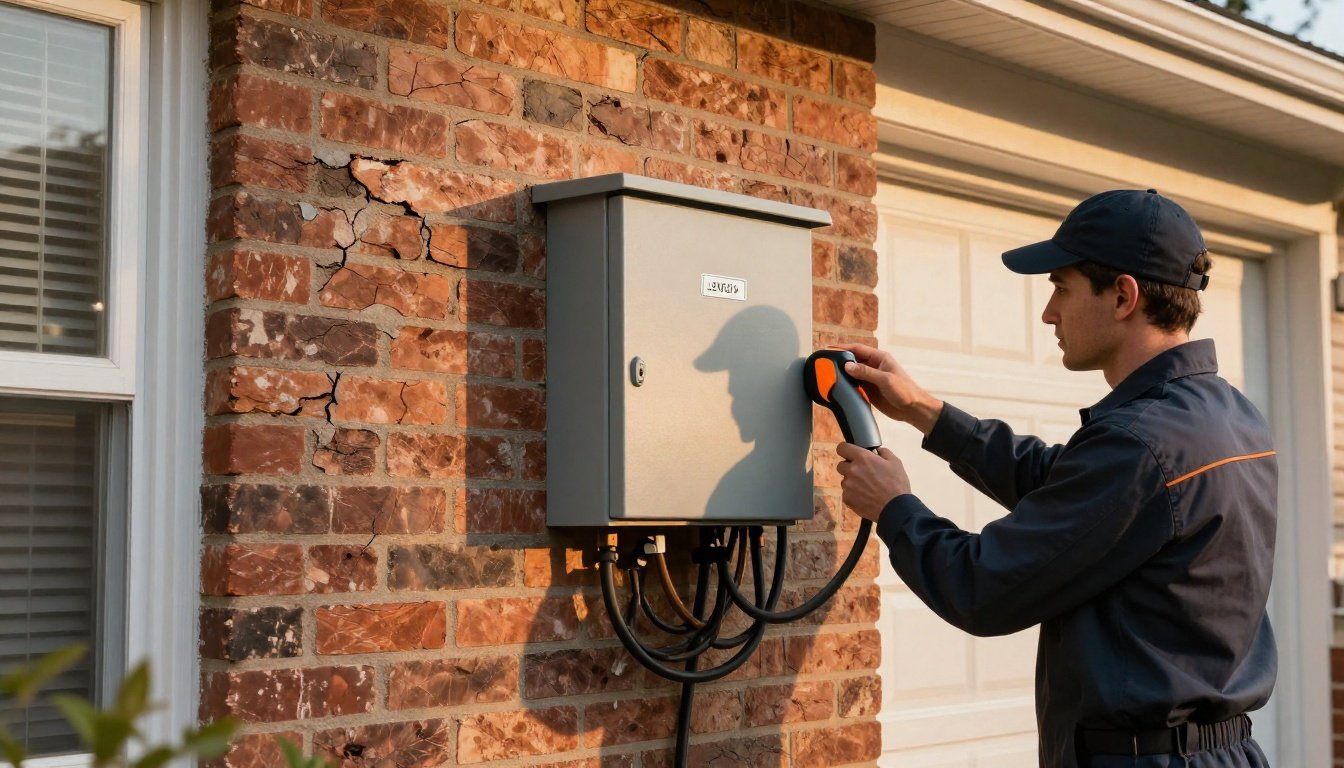
Why start at the service panel? Because a DC fast charger can exceed your home’s available amperage. Most residences have 100–200A, single‑phase services built under historical standards; Level 3 equipment often needs 480V three‑phase and 200–600A feeders. Begin with an NEC load calculation, then verify short‑circuit ratings, fault‑current availability, and grounding/bonding. Account for continuous-load sizing at 125%, dedicated overcurrent protection, a lockable disconnect, and working clearances.
Plan for major upgrades: three‑phase service, larger meter/main, CT cabinet, transformer, and utility coordination. Manufacturer variations in input current, power factor, and harmonics affect feeder size and protective devices. Obtain permits, utility approval, and AHJ inspections. Hire a licensed electrician and, if required, a professional engineer to stamp drawings and coordinate selective protection. Document utility fault-current calculations thoroughly.
Equipment Options and Typical Price Ranges

You’ll choose among DC fast charger types (roughly 50–80 kW, 150 kW, or 350 kW) that match your service capacity and your vehicle’s inlet. Expect hardware to cost about $12,000–$60,000+ by power level, with installation—utility upgrades, trenching, switchgear, and permits—often adding $10,000–$100,000+. Work with a licensed electrician and your AHJ/utility to use NEC-compliant, UL‑listed equipment, perform load calculations, and secure proper interconnection.
DC Fast Charger Types
Start by mapping the major DC fast charger categories and their costs: compact 20–30 kW wall/stand units (often single-port CCS or NACS, occasional CHAdeMO) run about $8,000–$15,000; mid-tier 50 kW pedestals are typically $20,000–$40,000; 75–100 kW systems with heavier duty cables land around $40,000–$80,000; and high-power 150–350 kW, usually with liquid-cooled cables and separate power cabinets, range from $80,000 to $300,000+.
Choose based on capacity, duty cycle, connector standards, and cooling methods properly.
- 20–30 kW: compact, lighter cables, single-port; best for occasional DC.
- 50 kW: balanced speed, common in fleets; dual-port options emerging.
- 75–100 kW: faster turns, heavier leads; may require active cable cooling.
- 150–200 kW: liquid-cooled cables, modular power; supports split charging safely reliably.
- 250–350 kW: highest output; strict derating in heat; future-ready NACS/CCS.
Hardware and Install Costs


Budgets drive decisions for a safe, code‑compliant Level 3 install at home. You’ll weigh charger capacity, site power, and utility requirements. Hardware often ranges from $12,000–$60,000, but balance-of-system costs can surpass the unit. Plan for engineered drawings, permits, utility coordination, and commissioning to satisfy NEC and manufacturer specs. Factor maintenance, uptime monitoring, and warranty differences; longer coverage can reduce lifetime risk. If cash is tight, explore financing options or utility rebates, but prioritize protective equipment and proper fault current ratings.
| Component | Typical cost range |
|---|---|
| DC fast charger (50–180 kW) | $12,000–$60,000+ |
| Switchgear, disconnects, panel upgrades | $5,000–$25,000 |
| Trenching, conduit, conductors | $3,000–$20,000 |
| Engineering, permits, commissioning | $4,000–$15,000 |
Installed totals commonly land between $25,000 and $120,000+, depending on service upgrades and distance to power. Get three licensed bids minimum.
Installation Scope: Panels, Transformers, and Trenching

How far you must go—from upgrading service panels to adding a dedicated transformer and trenching new feeders—depends on a formal load calculation and utility constraints. For a DC fast charger, you’ll plan for high fault currents, rigid raceways, and adequate working clearances. You’ll also budget for landscape restoration and possible driveway disruption after excavation.
- Perform NEC Article 220 load calc and short-circuit study to size panels, OCPD, and feeders.
- Specify dedicated distribution (pad-mount or wall-mount transformer) with listed switchgear and visible disconnect.
- Route concrete-encased conduit, proper burial depth, spare ducts, and caution tape for future-proofing.
- Provide grounding, bonding, and GFCI where required; verify fault paths and available fault current labeling.
- Plan pull boxes, bollards, drainage, and ADA-compliant equipment placement; schedule inspections.
Document everything carefully.
Utility Coordination, Service Upgrades, and Lead Times

You’ll need to coordinate early with your utility for interconnection approval, load studies, and meter requirements; lead times can run 8–24 weeks or more. Verify your existing service capacity against the charger’s demand using NEC load calculations, and plan for panel, transformer, or service-entrance upgrades if required by the utility or AHJ. Build your schedule and budget to include permits, utility construction windows, and outages, and don’t energize equipment until inspections pass.
Utility Approvals and Timelines
Before you spec a residential DC fast (Level 3) charger, coordinate with your electric utility to verify available capacity, interconnection requirements, and any demand or metering rules. Ask for the formal approval pathway, submittal checklist, and expected lead times. Many utilities offer expedited reviews for small commercial-style loads at residences; if denied, confirm appeal channels and resubmittal windows. Lock down inspection sequencing so you don’t energize equipment without written authorization. Get commitments in writing and track milestone dates.
- Book a pre-application meeting; document timelines and responsible parties.
- Submit one-line diagrams, load calcs, site plan, and equipment data sheets.
- Clarify study steps (screening, protection, metering); note typical durations.
- Confirm fees, refundable deposits, and required insurance or indemnities.
- Schedule meter work, witnessing, and commissioning dates early.
Service Capacity Upgrades
With utility approvals in hand, confirm whether your existing service can support a residential DC fast charger without exceeding meter-base, main-breaker, or transformer ratings. Coordinate a load calculation per NEC Article 220 and verify fault current, grounding, and clearances. If capacity’s short, plan a service upgrade: larger meter/main, new panel, upsized feeders, and a utility transformer review. Request utility design early; lead times for transformers and crews can run 8–24 weeks. Lock contractor availability, permit sequencing, and inspections to avoid idle delays. Compare single 100–200 kW units versus modular 25–50 kW to fit demand charges and site limits. Leverage financing options and incentive programs to offset upgrade costs; include make‑ready funds and demand-management controls.
| Hope | Risk | Action |
|---|---|---|
| Speed | Overload | Upgrade |
| Clarity | Delays | Schedule early |
Permitting, Code Compliance, and Inspection Steps

Although residential DC fast chargers are uncommon, most jurisdictions require a full electrical permit, utility approval for the added load, and inspections before energization. Coordinate early with your AHJ and utility. Submit stamped plans showing load calculations, one-line diagrams, equipment listings, available fault current, grounding, and NEC Article 625 compliance. Prepare a Documentation checklist and confirm Inspection readiness before scheduling.
- Apply for an electrical permit; include site plan, trenching, conductor sizing, OCPD, and a lockable disconnect.
- File a utility service request detailing short-circuit availability, transformer capacity, and meter/CT needs.
- Obtain structural/fire review for equipment pads, bollards, ventilation, and working clearances.
- Perform a pre-inspection: torque logs, labels, GFCI where required, and commissioning steps.
- Pass final inspection: verify clearances, bonding, signage, emergency shutoff, and functional tests.
Operating Costs: Demand Charges, TOU Rates, and Maintenance

Often, the biggest ongoing cost of a residential DC fast charger isn’t the kilowatt-hours—it’s when and how fast you pull them. Utilities may assess demand charges on your peak kW; even a few minutes at full output can spike your bill. Use charge-rate limits, scheduled sessions, and TOU enrollment to shift load to off-peak. If you practice grid arbitrage, do it within tariff rules and without defeating safety listings or NEC requirements. Budget for networking fees, software, and periodic calibration. Plan preventive maintenance: filter cleaning, coolant checks, torque verification, and insulation testing per the manufacturer. Use maintenance forecasting from telemetry to replace parts before failure. Keep surge protection, ventilation, and clearances compliant, and log all service to preserve warranty and safety and code compliance.
Technical Feasibility Scenarios for Single‑Family Homes

Before you pursue a home DC fast charger, confirm that your site and utility service can safely support it. Begin by verifying available service capacity, transformer loading, and fault current ratings; most single‑family panels and neighborhood transformers weren’t sized for 50–350 kW loads. Coordinate early with your utility, AHJ, and a licensed engineer to determine required upgrades, protective devices, and NEC compliance. Consider impacts on Owner Behavior and Neighborhood Perception, including noise, lighting, and traffic to your driveway.
- Electrical service: three‑phase availability, dedicated feeder, grounding, short‑circuit ratings.
- Site constraints: clearances, bollards, ventilation, rain protection, ADA paths.
- Thermal and acoustics: transformer location, cooling fans, nighttime limits.
- Safety and protection: OCPD coordination, GFPE, surge protection, emergency shutoff.
- Interconnection and metering: utility upgrades, easements, inspection, commissioning tests.
Smarter Alternatives: High‑Power Level 2 and Load Management

Rather than forcing a DC fast charger into a residential service, pair a high‑power Level 2 EVSE (9.6–19.2 kW on 50–100 A circuits) with intelligent load management to meet most turnaround needs while staying within code and utility limits.
You’ll add range quickly, protect your main, and satisfy NEC 625 and Article 220 load calculations. Use Smart Scheduling to shift charging to off‑peak windows and available panel headroom. Networked EVSEs throttle by circuit, share load across two cars, and follow utility demand‑response. Install a properly sized feeder, required GFCI, and a local disconnect when mandated. Set Behavioral Incentives—price alerts, departure‑time targets, and charge caps—to reinforce compliant use. Document settings, label breakers, and periodically test fault protection. You’ll approach DC‑like turnaround without risky service upgrades.
When a Home DC Fast Charger Makes Sense for Fleets and Businesses

While a high‑power Level 2 covers most needs, a home‑base DC fast charger can make sense when you operate a small fleet or business with tight turnarounds, high daily mileage, and limited dwell time between routes. You reduce downtime, control fueling costs, and guarantee code‑compliant, safe operations. Assess grid capacity, required permits, and utility tariffs before committing. For curbside visibility, place units where customers and staff can see them to reinforce Brand visibility. Standardize connectors and software to bolster Operational resilience across vehicles.
- Meet early‑morning dispatch with rapid turnaround charging capability.
- Backstop public network outages with onsite redundancy plans.
- Lock predictable costs via demand management and off‑peak scheduling.
- Protect batteries using OEM‑approved limits and thermal monitoring.
- Streamline fleet data, access control, and reimbursement reporting.
Conclusion
You can install a Level 3 charger at home, but you shouldn’t do it lightly. You’ll assess capacity, coordinate with your utility, and permit to code; you’ll upgrade service, install compliant switchgear, and verify grounding; you’ll budget for hardware, construction, and ongoing demand charges. If you need speed, choose smart Level 2; if you value safety, follow NEC and manufacturer specs; if you pursue DC fast, hire licensed pros and plan months, not days ahead.